
在深入探讨Mongoose的主要操作和功能之前, 让我们简要了解一下Mongoose的真正含义以及它如何使Node.js项目更加灵活和用户友好。
MongooseJs: Mongoose基本上是一个包,作为NodeJS应用程序和MongoDB服务器之间的中介。它是一个对象文档映射器(ODM),允许我们定义映射到MongoDB文档的强类型模式的对象。Mongoose支持所有的CRUD操作-创建,检索,更新和删除。
先决条件:由于我们将使用Express来设置基本服务器, 因此我们建议你阅读有关快递和官方快递文档的文章。其他要求包括MongoDB Atlas和Postman。
安装:使用下面的命令通过npm安装mongoose和express模块:
npm install express mongoose --saveMongoDB Atlas设置:
- 设置一个帐户。
- 建立一个新的集群。
- 转到数据库访问, 然后单击"添加新用户"。添加用户名和密码, 如果你自动生成密码, 请确保将其复制, 以后再需要。
- 将你的IP地址列入白名单。单击"添加当前IP地址"并确认。
- 转到群集, 如果完成群集构建, 则单击"连接", "连接应用程序", 然后复制它提供的URL。
Postman设置:我们将使用Postman来管理我们的请求。下载完成后, 点击"创建请求"选项。每次创建新的API端点时, 我们都会为其设置另一个请求。这将帮助你管理所有内容, 从而不必在任何地方复制/粘贴HTTP请求。
服务器设置:在这里, 我们将在端口3000上设置服务器, 并调用express函数, 该函数在名为app的变量中返回服务器对象。然后, 我们启动侦听器, 并使用端口地址说出app.listen。最后, 我们创建/ api路由, 一旦从浏览器收到请求localhost:3000/api, 就会触发该路由。
档案名称:Server.js
const express=require( 'express' );
const bodyParser=require( 'body-parser' );
const api = require( './api' );

const port=3000;
const app=express();

app.listen(port, function () {
     console.log( "Server is listening at port:" + port);
});

//Parses the text as url encoded data
app.use(bodyParser.urlencoded({extended: true }));

//Parses the text as json
app.use(bodyParser.json());

app.use( '/api' , api);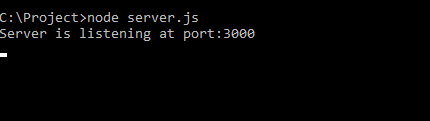
服务器在所需端口上运行
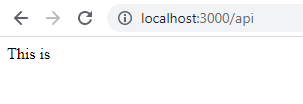
示例输出以检查api路由的工作情况
架构:模式是数据结构的表示。它使我们能够准确地决定我们想要什么数据, 以及我们希望数据作为对象具有哪些选项。
文件名:studentschema.js
var mongoose=require( 'mongoose' );

var StudentSchema = new mongoose.Schema({
     StudentId:Number, Name:String, Roll:Number, Birthday:Date, Address:String
});

module.exports = mongoose.model(
     'student' , StudentSchema, 'Students' );
创建名为" StuentSchema"的模式, 该模式接受字段Id, Name, Roll, Birthday, Address。
模型基本上提供了预定义方法的列表, 这些预定义方法用于操作数据以从数据库集合中进行插入, 更新, 删除和检索。
在这种基本模式下, 我们将使用mongoose.model方法使其可用于实际数据并将其导出, 以便可以在api.js中使用。
高级路由和MongoDB连接:
档名:api.js当你向localhost:3000/api发送请求时, express将搜索api路由并执行api.js文件。
var mongoose = require( 'mongoose' );
var express = require( 'express' );
var router = express.Router();
var StudentModel = require( './studentschema' );

//Connecting to database
var query = 'mongodb+srv://Username:<password>'
     + '@student.tuufn.mongodb.net/College?'
     + 'retryWrites=true&w=majority'

const db = (query);
mongoose.Promise = global.Promise;

mongoose.connect(db, { useNewUrlParser : true , useUnifiedTopology: true }, function (error) {
     if (error) {
         console.log( "Error!" + error);
     }
});

module.exports = router;
该数据库是学院和数据库中的集合在学生们。

蒙哥数据库概览
欺诈操作
创造:
我们将设置" /保存"的发帖请求, 并使用我们的模型创建一个新的Student对象, 并将来自Postman的请求数据传递给该对象。
完成此操作后, 我们将使用.save()将其保存到数据库。
router.get('/save', function(req, res) {
    var newStudent = new StudentModel({StudentId:101, Name:"Sam", Roll:1, Birthday:2001-09-08});

    newStudent.save(function(err, data) {
        if(err) {
            console.log(error);
        }
        else {
            res.send("Data inserted");
        }
    });
});
使用StudentModel创建学生的新实例, 并将引用存储在变量newStudent中。使用newStudent变量, 我们将新学生的文档保存到数据库集合中。
为此, 在Postman中, 我们将发出GET请求localhost:3000/api/save
注意:我们甚至可以插入新文档, 而无需像上面那样对字段进行硬编码。为此, 我们需要将请求从GET更改为POST, 并使用body-parser中间件接受新学生的数据。这样可以确保我们可以插入所需数量的学生详细信息。
router.post('/save', function(req, res) {
var newStudent = new StudentModel();
   newStudent.StudentId = req.body.StudentId;
   newStudent.Name = req.body.Name;
   newStudent.Roll = req.body.Roll;
   newStudent.Birthday = req.body.Birthday;

   newStudent.save(function(err, data){
       if(err){
           console.log(error);
       }
       else{
           res.send("Data inserted");
       }
   });
});
检索:
为了从数据库集合中检索记录, 我们使用.find()函数。
router.get('/findall', function(req, res) {
   StudentModel.find(function(err, data) {
       if(err){
           console.log(err);
       }
       else{
           res.send(data);
       }
   });
});
在Postman中, 我们使用URL localhost:3000/api/findall发出新的GET请求, 然后单击send。它发出我们的HTTP GET请求, 并从我们的数据库集合中返回所有学生的文档。
要检索单个记录或第一个处理的文档, 我们使用功能findOne()。
router.get('/findfirst', function(req, res) {
    StudentModel.findOne({StudentId:{$gt:185}}, function(err, data) {
        if(err){
            console.log(err);
        }
        else{
            res.send(data);
        }
    });
});
在Postman中, 我们使用URL localhost:3000/api/findfirst发出一个新的GET请求并点击send, 它发出HTTP GET请求并返回符合条件的第一个文档学生编号:$ gt:185($ gt表示大于)。
删除:
要从数据库中删除记录, 我们使用.remove()函数。它接受条件, 该条件是执行删除所依据的参数。这里的条件是Id:188。
router.get('/delete', function(req, res) {
    StudentModel.remove({StudentId:188}, function(err, data) {
        if(err){
            console.log(err);
        }
        else{
            res.send(data);
        }
    });
});
我们还可以使用.findByIdAndDelete()方法轻松地从数据库中删除一条记录。用Mongoose创建的每个对象都有自己的_id, 我们可以使用它通过DELETE请求定位特定的项目。
router.post('/delete', function(req, res) {
    StudentModel.findByIdAndDelete((req.body.id), function(err, data) {
        if(err){
            console.log(err);
        }
        else{
            res.send(data);
            console.log("Data Deleted!");
        }
    });
});
更新:
就像删除请求一样, 我们将使用_id定位正确的项目。 .findByIdAndUpdate()获取目标的ID, 以及你要替换为该目标的请求数据。
router.post('/update', function(req, res) {
    StudentModel.findByIdAndUpdate(req.body.id, {Name:req.body.Name}, function(err, data) {
        if(err){
            console.log(err);
        }
        else{
            res.send(data);
            console.log("Data updated!");
        }
    });
});
如何从数据库集合中检索最新记录:要检索最新记录, 我们需要两个基本功能:
- .sort()–接受一个参数, 根据该参数将数据按降序(-1)或升序(1)排序。
- .limit()–决定需要检索的文档数。
例子:假设我想获取最近入读该大学的学生的记录。以下代码段为我们完成了这项工作。
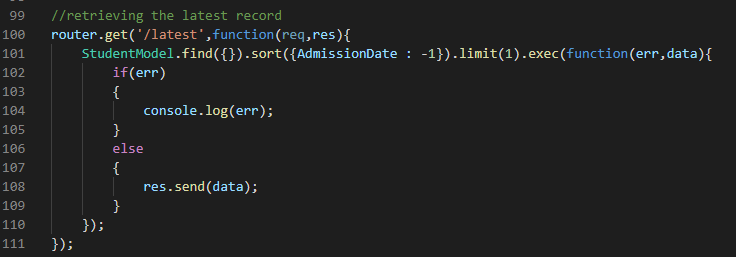
检索最新数据的代码段
注意:limit()不能在没有.sort()的情况下使用, 因为它可能会在以后导致难以跟踪的错误。这是因为我们无法保证结果的顺序。我们会在结果顶部获得不同的记录, 这是不希望的。为了使查询具有确定性, 每次执行时它们都必须给出相同的结果。

