
如何使用Python提取PDF图像中的文本?本文带你了解如何利用 tesseract、OpenCV、PyMuPDF 和许多其他库使用 Python 从 PDF 文件中的图像中提取文本。
如今,大中型企业在日常使用中拥有大量的打印文档。其中包括发票、收据、公司文件、报告和媒体发布。
对于这些公司来说,使用 OCR 扫描仪可以节省大量时间,同时提高效率和准确性。
Python如何提取PDF文件图像中的文本?光学字符识别 (OCR)算法允许计算机自动分析打印或手写的文档,并将文本数据准备为可编辑的格式,以便计算机进行有效处理。OCR 系统将可能包含机器打印或手写文本的二维文本图像从其图像表示转换为机器可读文本。
通常,OCR 引擎涉及训练机器学习算法以在光学字符识别的帮助下有效解决问题所需的多个步骤。
实现自动字符识别大致需要以下可能因引擎而异的以下步骤:在本教程中,我将向你展示以下内容:
- 如何对图像文件运行 OCR 扫描仪。
- 如何编辑或突出显示图像文件中的特定文本。
- 如何在 PDF 文件或 PDF 文件集合上运行 OCR 扫描仪。
在开始详细的Python提取PDF文件图像中的文本示例之前,首先,我们需要使用以下库:
Tesseract OCR: 是一种开源文本识别引擎,在 Apache 2.0 许可下可用,其开发自 2006 年以来一直由 Google 赞助。在 2006 年,Tesseract 被认为是最准确的开源 OCR 引擎之一。你可以直接使用它,也可以使用 API 从图像中提取打印文本。最好的部分是它支持多种语言。
安装 Tesseract 引擎超出了本文的范围。但是,你需要按照Tesseract 的官方安装指南将其安装到你的操作系统上。
要验证 Tesseract 设置,请运行以下命令并检查生成的输出:
 Python-tesseract:是 Google 的 Tesseract-OCR 引擎的 Python 包装器。它也可用作 tesseract 的独立调用脚本,因为它可以读取 Pillow 和 Leptonica 成像库支持的所有图像类型,包括 jpeg、png、gif、bmp、tiff 等。
OpenCV:是一个 Python 开源库,用于计算机视觉、机器学习和图像处理。OpenCV 支持多种编程语言,如 Python、C++、Java 等。它可以处理图像和视频以识别对象、面部,甚至是人类的笔迹。
PyMuPDF: MuPDF 是一种高度通用、可定制的 PDF、XPS 和电子书解释器解决方案,可作为 PDF 渲染器、查看器或工具包在广泛的应用程序中使用。PyMuPDF 是 MuPDF 的 Python 绑定。它是一个轻量级的 PDF 和 XPS 查看器。
Numpy:是一个通用的数组处理包。它提供了一个高性能的多维数组对象,以及用于处理这些数组的工具。它是使用 Python 进行科学计算的基本包。此外,Numpy 还可以用作通用数据的高效多维容器。
Pillow:建立在 PIL(Python 图像库)之上。它是 Python 中图像处理的重要模块。
Pandas:是一个开源的、BSD 许可的 Python 库,为 Python 编程语言提供高性能、易于使用的数据结构和数据分析工具。
文件类型:用于推断文件类型和 MIME 类型的小型且无依赖的 Python 包。
如何使用Python提取PDF图像中的文本?本教程旨在开发一个基于命令行的轻量级实用程序,用于提取、编辑或突出显示图像或扫描的 PDF 文件中或包含 PDF 文件集合的文件夹中的文本。
设置
Python如何提取PDF文件图像中的文本?首先,让我们安装要求:
$ pip install Filetype==1.0.7 numpy==1.19.4 opencv-python==4.4.0.46 pandas==1.1.4 Pillow==8.0.1 PyMuPDF==1.18.9 pytesseract==0.3.7
让我们从导入必要的库开始:
import os
import re
import argparse
import pytesseract
from pytesseract import Output
import cv2
import numpy as np
import fitz
from io import BytesIO
from PIL import Image
import pandas as pd
import filetype

# Path Of The Tesseract OCR engine
TESSERACT_PATH = "C:\Program Files\Tesseract-OCR\tesseract.exe"
# Include tesseract executable
pytesseract.pytesseract.tesseract_cmd = TESSERACT_PATHTESSERACT_PATH是 Tesseract 可执行文件所在的位置。显然,你需要根据自己的情况更改它。
def pix2np(pix):
    """
    Converts a pixmap buffer into a numpy array
    """
    # pix.samples = sequence of bytes of the image pixels like RGBA
    #pix.h = height in pixels
    #pix.w = width in pixels
    # pix.n = number of components per pixel (depends on the colorspace and alpha)
    im = np.frombuffer(pix.samples, dtype=np.uint8).reshape(
        pix.h, pix.w, pix.n)
    try:
        im = np.ascontiguousarray(im[..., [2, 1, 0]])  # RGB To BGR
    except IndexError:
        # Convert Gray to RGB
        im = cv2.cvtColor(im, cv2.COLOR_GRAY2RGB)
        im = np.ascontiguousarray(im[..., [2, 1, 0]])  # RGB To BGR
    return im
此函数将表示使用PyMuPDF库截取的屏幕截图的像素图缓冲区转换为 NumPy 数组。
为了提高 Tesseract 的准确性,让我们使用 OpenCV 定义一些预处理函数:
# Image Pre-Processing Functions to improve output accurracy
# Convert to grayscale
def grayscale(img):
    return cv2.cvtColor(img, cv2.COLOR_BGR2GRAY)

# Remove noise
def remove_noise(img):
    return cv2.medianBlur(img, 5)

# Thresholding
def threshold(img):
    # return cv2.threshold(img, 0, 255, cv2.THRESH_BINARY + cv2.THRESH_OTSU)[1]
    return cv2.threshold(img, 0, 255, cv2.THRESH_BINARY | cv2.THRESH_OTSU)[1]

# dilation
def dilate(img):
    kernel = np.ones((5, 5), np.uint8)
    return cv2.dilate(img, kernel, iterations=1)

# erosion
def erode(img):
    kernel = np.ones((5, 5), np.uint8)
    return cv2.erode(img, kernel, iterations=1)

# opening -- erosion followed by a dilation
def opening(img):
    kernel = np.ones((5, 5), np.uint8)
    return cv2.morphologyEx(img, cv2.MORPH_OPEN, kernel)

# canny edge detection
def canny(img):
    return cv2.Canny(img, 100, 200)

# skew correction
def deskew(img):
    coords = np.column_stack(np.where(img > 0))
    angle = cv2.minAreaRect(coords)[-1]
    if angle < -45:
        angle = -(90 + angle)
    else:
        angle = -angle
    (h, w) = img.shape[:2]
    center = (w//2, h//2)
    M = cv2.getRotationMatrix2D(center, angle, 1.0)
    rotated = cv2.warpAffine(
        img, M, (w, h), flags=cv2.INTER_CUBIC, borderMode=cv2.BORDER_REPLICATE)
    return rotated

# template matching
def match_template(img, template):
    return cv2.matchTemplate(img, template, cv2.TM_CCOEFF_NORMED)

def convert_img2bin(img):
    """
    Pre-processes the image and generates a binary output
    """
    # Convert the image into a grayscale image
    output_img = grayscale(img)
    # Invert the grayscale image by flipping pixel values.
    # All pixels that are grater than 0 are set to 0 and all pixels that are = to 0 are set to 255
    output_img = cv2.bitwise_not(output_img)
    # Converting image to binary by Thresholding in order to show a clear separation between white and blacl pixels.
    output_img = threshold(output_img)
    return output_img
我们为许多预处理任务定义了函数,包括将图像转换为灰度、翻转像素值、分离白色和黑色像素等等。接下来,让我们定义一个函数来显示图像:
def display_img(title, img):
    """Displays an image on screen and maintains the output until the user presses a key"""
    cv2.namedWindow('img', cv2.WINDOW_NORMAL)
    cv2.setWindowTitle('img', title)
    cv2.resizeWindow('img', 1200, 900)
    # Display Image on screen
    cv2.imshow('img', img)
    # Mantain output until user presses a key
    cv2.waitKey(0)
    # Destroy windows when user presses a key
cv2.destroyAllWindows()该display_img()函数在屏幕上显示标题设置为title参数的窗口中的图像,并保持该窗口打开,直到用户按下键盘上的某个键。
def generate_ss_text(ss_details):
    """Loops through the captured text of an image and arranges this text line by line.
    This function depends on the image layout."""
    # Arrange the captured text after scanning the page
    parse_text = []
    word_list = []
    last_word = ''
    # Loop through the captured text of the entire page
    for word in ss_details['text']:
        # If the word captured is not empty
        if word != '':
            # Add it to the line word list
            word_list.append(word)
            last_word = word
        if (last_word != '' and word == '') or (word == ss_details['text'][-1]):
            parse_text.append(word_list)
            word_list = []
    return parse_text
上述函数遍历捕获的图像文本并逐行排列捕获的文本。这取决于图像布局,并且可能需要针对某些图像格式进行调整。
相关: 如何在 Python 中合并 PDF 文件。
Python提取PDF文件图像中的文本示例:接下来,让我们定义一个使用正则表达式搜索文本的函数:
def search_for_text(ss_details, search_str):
    """Search for the search string within the image content"""
    # Find all matches within one page
    results = re.findall(search_str, ss_details['text'], re.IGNORECASE)
    # In case multiple matches within one page
    for result in results:
        yield result
我们将使用此功能在图像的抓取内容中搜索特定文本。它返回找到的匹配项的生成器。
def save_page_content(pdfContent, page_id, page_data):
    """Appends the content of a scanned page, line by line, to a pandas DataFrame."""
    if page_data:
        for idx, line in enumerate(page_data, 1):
            line = ' '.join(line)
            pdfContent = pdfContent.append(
                {'page': page_id, 'line_id': idx, 'line': line}, ignore_index=True
            )
return pdfContentsave_page_content()在将图像扫描到pdfContentPandas 数据帧后,函数将其逐行附加到图像中。
如何使用Python提取PDF图像中的文本?现在让我们创建一个函数来将结果数据帧保存到 CSV 文件中:
def save_file_content(pdfContent, input_file):
    """Outputs the content of the pandas DataFrame to a CSV file having the same path as the input_file
    but with different extension (.csv)"""
    content_file = os.path.join(os.path.dirname(input_file), os.path.splitext(
        os.path.basename(input_file))[0] + ".csv")
    pdfContent.to_csv(content_file, sep=',', index=False)
    return content_file
接下来,让我们编写一个函数来计算从扫描图像中抓取的文本的置信度分数:
def calculate_ss_confidence(ss_details: dict):
    """Calculate the confidence score of the text grabbed from the scanned image."""
    # page_num  --> Page number of the detected text or item
    # block_num --> Block number of the detected text or item
    # par_num   --> Paragraph number of the detected text or item
    # line_num  --> Line number of the detected text or item
    # Convert the dict to dataFrame
    df = pd.DataFrame.from_dict(ss_details)
    # Convert the field conf (confidence) to numeric
    df['conf'] = pd.to_numeric(df['conf'], errors='coerce')
    # Elliminate records with negative confidence
    df = df[df.conf != -1]
    # Calculate the mean confidence by page
    conf = df.groupby(['page_num'])['conf'].mean().tolist()
    return conf[0]
转到主要功能:扫描图像:
def ocr_img(
        img: np.array, input_file: str, search_str: str,
        highlight_readable_text: bool = False, action: str = 'Highlight',
        show_comparison: bool = False, generate_output: bool = True):
    """Scans an image buffer or an image file.
    Pre-processes the image.
    Calls the Tesseract engine with pre-defined parameters.
    Calculates the confidence score of the image grabbed content.
    Draws a green rectangle around readable text items having a confidence score > 30.
    Searches for a specific text.
    Highlight or redact found matches of the searched text.
    Displays a window showing readable text fields or the highlighted or redacted text.
    Generates the text content of the image.
    Prints a summary to the console."""
    # If image source file is inputted as a parameter
    if input_file:
        # Reading image using opencv
        img = cv2.imread(input_file)
    # Preserve a copy of this image for comparison purposes
    initial_img = img.copy()
    highlighted_img = img.copy()
    # Convert image to binary
    bin_img = convert_img2bin(img)
    # Calling Tesseract
    # Tesseract Configuration parameters
    # oem --> OCR engine mode = 3 >> Legacy + LSTM mode only (LSTM neutral net mode works the best)
    # psm --> page segmentation mode = 6 >> Assume as single uniform block of text (How a page of text can be analyzed)
    config_param = r'--oem 3 --psm 6'
    # Feeding image to tesseract
    details = pytesseract.image_to_data(
        bin_img, output_type=Output.DICT, config=config_param, lang='eng')
    # The details dictionary contains the information of the input image
    # such as detected text, region, position, information, height, width, confidence score.
    ss_confidence = calculate_ss_confidence(details)
    boxed_img = None
    # Total readable items
    ss_readable_items = 0
    # Total matches found
    ss_matches = 0
    for seq in range(len(details['text'])):
        # Consider only text fields with confidence score > 30 (text is readable)
        if float(details['conf'][seq]) > 30.0:
            ss_readable_items += 1
            # Draws a green rectangle around readable text items having a confidence score > 30
            if highlight_readable_text:
                (x, y, w, h) = (details['left'][seq], details['top']
                                [seq], details['width'][seq], details['height'][seq])
                boxed_img = cv2.rectangle(
                    img, (x, y), (x+w, y+h), (0, 255, 0), 2)
            # Searches for the string
            if search_str:
                results = re.findall(
                    search_str, details['text'][seq], re.IGNORECASE)
                for result in results:
                    ss_matches += 1
                    if action:
                        # Draw a red rectangle around the searchable text
                        (x, y, w, h) = (details['left'][seq], details['top']
                                        [seq], details['width'][seq], details['height'][seq])
                        # Details of the rectangle
                        # Starting coordinate representing the top left corner of the rectangle
                        start_point = (x, y)
                        # Ending coordinate representing the botton right corner of the rectangle
                        end_point = (x + w, y + h)
                        #Color in BGR -- Blue, Green, Red
                        if action == "Highlight":
                            color = (0, 255, 255)  # Yellow
                        elif action == "Redact":
                            color = (0, 0, 0)  # Black
                        # Thickness in px (-1 will fill the entire shape)
                        thickness = -1
                        boxed_img = cv2.rectangle(
                            img, start_point, end_point, color, thickness)

    if ss_readable_items > 0 and highlight_readable_text and not (ss_matches > 0 and action in ("Highlight", "Redact")):
        highlighted_img = boxed_img.copy()
    # Highlight found matches of the search string
    if ss_matches > 0 and action == "Highlight":
        cv2.addWeighted(boxed_img, 0.4, highlighted_img,
                        1 - 0.4, 0, highlighted_img)
    # Redact found matches of the search string
    elif ss_matches > 0 and action == "Redact":
        highlighted_img = boxed_img.copy()
        #cv2.addWeighted(boxed_img, 1, highlighted_img, 0, 0, highlighted_img)
    # save the image
    cv2.imwrite("highlighted-text-image.jpg", highlighted_img)
    # Displays window showing readable text fields or the highlighted or redacted data
    if show_comparison and (highlight_readable_text or action):
        title = input_file if input_file else 'Compare'
        conc_img = cv2.hconcat([initial_img, highlighted_img])
        display_img(title, conc_img)
    # Generates the text content of the image
    output_data = None
    if generate_output and details:
        output_data = generate_ss_text(details)
    # Prints a summary to the console
    if input_file:
        summary = {
            "File": input_file, "Total readable words": ss_readable_items, "Total matches": ss_matches, "Confidence score": ss_confidence
        }
        # Printing Summary
        print("## Summary ########################################################")
        print("\n".join("{}:{}".format(i, j) for i, j in summary.items()))
        print("###################################################################")
    return highlighted_img, ss_readable_items, ss_matches, ss_confidence, output_data
    # pass image into pytesseract module
    # pytesseract is trained in many languages
    #config_param = r'--oem 3 --psm 6'
    #details = pytesseract.image_to_data(img,config=config_param,lang='eng')
    # print(details)
    # return details
Python如何提取PDF文件图像中的文本?以上执行以下操作:
- 扫描图像缓冲区或图像文件。
- 预处理图像。
- 使用预定义的参数运行 Tesseract 引擎。
- 计算图像抓取内容的置信度分数。
- 在可信度大于 30 的可读文本项周围绘制一个绿色矩形。
- 在图像抓取的内容中搜索特定文本。
- 突出显示或编辑搜索到的文本的匹配项。
- 显示一个窗口,其中显示可读文本字段或突出显示的文本或编辑后的文本。
- 生成图像的文本内容。
- 将摘要打印到控制台。
def image_to_byte_array(image: Image):
    """
    Converts an image into a byte array
    """
    imgByteArr = BytesIO()
    image.save(imgByteArr, format=image.format if image.format else 'JPEG')
    imgByteArr = imgByteArr.getvalue()
    return imgByteArr

def ocr_file(**kwargs):
    """Opens the input PDF File.
    Opens a memory buffer for storing the output PDF file.
    Creates a DataFrame for storing pages statistics
    Iterates throughout the chosen pages of the input PDF file
    Grabs a screen-shot of the selected PDF page.
    Converts the screen-shot pix to a numpy array
    Scans the grabbed screen-shot.
    Collects the statistics of the screen-shot(page).
    Saves the content of the screen-shot(page).
    Adds the updated screen-shot (Highlighted, Redacted) to the output file.
    Saves the whole content of the PDF file.
    Saves the output PDF file if required.
    Prints a summary to the console."""
    input_file = kwargs.get('input_file')
    output_file = kwargs.get('output_file')
    search_str = kwargs.get('search_str')
    pages = kwargs.get('pages')
    highlight_readable_text = kwargs.get('highlight_readable_text')
    action = kwargs.get('action')
    show_comparison = kwargs.get('show_comparison')
    generate_output = kwargs.get('generate_output')
    # Opens the input PDF file
    pdfIn = fitz.open(input_file)
    # Opens a memory buffer for storing the output PDF file.
    pdfOut = fitz.open()
    # Creates an empty DataFrame for storing pages statistics
    dfResult = pd.DataFrame(
        columns=['page', 'page_readable_items', 'page_matches', 'page_total_confidence'])
    # Creates an empty DataFrame for storing file content
    if generate_output:
        pdfContent = pd.DataFrame(columns=['page', 'line_id', 'line'])
    # Iterate throughout the pages of the input file
    for pg in range(pdfIn.pageCount):
        if str(pages) != str(None):
            if str(pg) not in str(pages):
                continue
        # Select a page
        page = pdfIn[pg]
        # Rotation angle
        rotate = int(0)
        # PDF Page is converted into a whole picture 1056*816 and then for each picture a screenshot is taken.
        # zoom = 1.33333333 -----> Image size = 1056*816
        # zoom = 2 ---> 2 * Default Resolution (text is clear, image text is hard to read)    = filesize small / Image size = 1584*1224
        # zoom = 4 ---> 4 * Default Resolution (text is clear, image text is barely readable) = filesize large
        # zoom = 8 ---> 8 * Default Resolution (text is clear, image text is readable) = filesize large
        zoom_x = 2
        zoom_y = 2
        # The zoom factor is equal to 2 in order to make text clear
        # Pre-rotate is to rotate if needed.
        mat = fitz.Matrix(zoom_x, zoom_y).preRotate(rotate)
        # To captue a specific part of the PDF page
        # rect = page.rect #page size
        # mp = rect.tl + (rect.bl - (0.75)/zoom_x) #rectangular area 56 = 75/1.3333
        # clip = fitz.Rect(mp,rect.br) #The area to capture
        # pix = page.getPixmap(matrix=mat, alpha=False,clip=clip)
        # Get a screen-shot of the PDF page
        # Colorspace -> represents the color space of the pixmap (csRGB, csGRAY, csCMYK)
        # alpha -> Transparancy indicator
        pix = page.getPixmap(matrix=mat, alpha=False, colorspace="csGRAY")
        # convert the screen-shot pix to numpy array
        img = pix2np(pix)
        # Erode image to omit or thin the boundaries of the bright area of the image
        # We apply Erosion on binary images.
        #kernel = np.ones((2,2) , np.uint8)
        #img = cv2.erode(img,kernel,iterations=1)
        upd_np_array, pg_readable_items, pg_matches, pg_total_confidence, pg_output_data \
            = ocr_img(img=img, input_file=None, search_str=search_str, highlight_readable_text=highlight_readable_text  # False
                      , action=action  # 'Redact'
                      , show_comparison=show_comparison  # True
                      , generate_output=generate_output  # False
                      )
        # Collects the statistics of the page
        dfResult = dfResult.append({'page': (pg+1), 'page_readable_items': pg_readable_items,
                                   'page_matches': pg_matches, 'page_total_confidence': pg_total_confidence}, ignore_index=True)
        if generate_output:
            pdfContent = save_page_content(
                pdfContent=pdfContent, page_id=(pg+1), page_data=pg_output_data)
        # Convert the numpy array to image object with mode = RGB
        #upd_img = Image.fromarray(np.uint8(upd_np_array)).convert('RGB')
        upd_img = Image.fromarray(upd_np_array[..., ::-1])
        # Convert the image to byte array
        upd_array = image_to_byte_array(upd_img)
        # Get Page Size
        """
        #To check whether initial page is portrait or landscape
        if page.rect.width > page.rect.height:
            fmt = fitz.PaperRect("a4-1")
        else:
            fmt = fitz.PaperRect("a4")

        #pno = -1 -> Insert after last page
        pageo = pdfOut.newPage(pno = -1, width = fmt.width, height = fmt.height)
        """
        pageo = pdfOut.newPage(
            pno=-1, width=page.rect.width, height=page.rect.height)
        pageo.insertImage(page.rect, stream=upd_array)
        #pageo.insertImage(page.rect, stream=upd_img.tobytes())
        #pageo.showPDFpage(pageo.rect, pdfDoc, page.number)
    content_file = None
    if generate_output:
        content_file = save_file_content(
            pdfContent=pdfContent, input_file=input_file)
    summary = {
        "File": input_file, "Total pages": pdfIn.pageCount,
        "Processed pages": dfResult['page'].count(), "Total readable words": dfResult['page_readable_items'].sum(),
        "Total matches": dfResult['page_matches'].sum(), "Confidence score": dfResult['page_total_confidence'].mean(),
        "Output file": output_file, "Content file": content_file
    }
    # Printing Summary
    print("## Summary ########################################################")
    print("\n".join("{}:{}".format(i, j) for i, j in summary.items()))
    print("\nPages Statistics:")
    print(dfResult, sep='\n')
    print("###################################################################")
    pdfIn.close()
    if output_file:
        pdfOut.save(output_file)
pdfOut.close()该image_to_byte_array()函数将图像转换为字节数组。
该ocr_file()函数执行以下操作:
- 打开输入的 PDF 文件。
- 打开用于存储输出 PDF 文件的内存缓冲区。
- 创建一个用于存储页面统计信息的 Pandas 数据框。
- 遍历输入 PDF 文件的选定页面。
- 抓取输入 PDF 文件所选页面的屏幕截图(图像)。
- 将屏幕截图 (pix) 转换为 NumPy 数组。
- 扫描抓取的屏幕截图。
- 收集屏幕截图(页面)的统计信息。
- 保存截图的内容。
- 将更新的屏幕截图添加到输出文件中。
- 将输入 PDF 文件的全部内容保存为 CSV 文件。
- 如果需要,保存输出 PDF 文件。
- 将摘要打印到控制台。
让我们添加另一个函数来处理包含多个 PDF 文件的文件夹:
def ocr_folder(**kwargs):
    """Scans all PDF Files within a specified path"""
    input_folder = kwargs.get('input_folder')
    # Run in recursive mode
    recursive = kwargs.get('recursive')
    search_str = kwargs.get('search_str')
    pages = kwargs.get('pages')
    action = kwargs.get('action')
    generate_output = kwargs.get('generate_output')
    # Loop though the files within the input folder.
    for foldername, dirs, filenames in os.walk(input_folder):
        for filename in filenames:
            # Check if pdf file
            if not filename.endswith('.pdf'):
                continue
            # PDF File found
            inp_pdf_file = os.path.join(foldername, filename)
            print("Processing file =", inp_pdf_file)
            output_file = None
            if search_str:
                # Generate an output file
                output_file = os.path.join(os.path.dirname(
                    inp_pdf_file), 'ocr_' + os.path.basename(inp_pdf_file))
            ocr_file(
                input_file=inp_pdf_file, output_file=output_file, search_str=search_str, pages=pages, highlight_readable_text=False, action=action, show_comparison=False, generate_output=generate_output
            )
        if not recursive:
            break
Python提取PDF文件图像中的文本示例解释:此功能旨在扫描包含在特定文件夹中的 PDF 文件。它根据参数 recursive 的值递归或不递归地遍历指定文件夹的文件,并逐个处理这些文件。
它接受以下参数:
input_folder:包含要处理的 PDF 文件的文件夹的路径。search_str: 要搜索的文本进行操作。recursive:是否通过遍历子文件夹递归地运行此过程。action:要执行以下操作:突出显示、编辑。pages: 要考虑的页面。generate_output: 选择是否将输入的 PDF 文件的内容保存为 CSV 文件
在完成之前,让我们定义一些有用的函数来解析命令行参数:
def is_valid_path(path):
    """Validates the path inputted and checks whether it is a file path or a folder path"""
    if not path:
        raise ValueError(f"Invalid Path")
    if os.path.isfile(path):
        return path
    elif os.path.isdir(path):
        return path
    else:
        raise ValueError(f"Invalid Path {path}")


def parse_args():
    """Get user command line parameters"""
    parser = argparse.ArgumentParser(description="Available Options")
    parser.add_argument('-i', '--input-path', type=is_valid_path,
                        required=True, help="Enter the path of the file or the folder to process")
    parser.add_argument('-a', '--action', choices=[
                        'Highlight', 'Redact'], type=str, help="Choose to highlight or to redact")
    parser.add_argument('-s', '--search-str', dest='search_str',
                        type=str, help="Enter a valid search string")
    parser.add_argument('-p', '--pages', dest='pages', type=tuple,
                        help="Enter the pages to consider in the PDF file, e.g. (0,1)")
    parser.add_argument("-g", "--generate-output", action="store_true", help="Generate text content in a CSV file")
    path = parser.parse_known_args()[0].input_path
    if os.path.isfile(path):
        parser.add_argument('-o', '--output_file', dest='output_file',
                            type=str, help="Enter a valid output file")
        parser.add_argument("-t", "--highlight-readable-text", action="store_true", help="Highlight readable text in the generated image")
        parser.add_argument("-c", "--show-comparison", action="store_true", help="Show comparison between captured image and the generated image")
    if os.path.isdir(path):
        parser.add_argument("-r", "--recursive", action="store_true", help="Whether to process the directory recursively")
    # To Porse The Command Line Arguments
    args = vars(parser.parse_args())
    # To Display The Command Line Arguments
    print("## Command Arguments #################################################")
    print("\n".join("{}:{}".format(i, j) for i, j in args.items()))
    print("######################################################################")
return args该is_valid_path()函数验证作为参数输入的路径并检查它是文件路径还是目录路径。
该parse_args()函数在运行此实用程序时为用户的命令行参数定义并设置适当的约束。
Python如何提取PDF文件图像中的文本?下面是对所有参数的解释:
input_path: 一个必需参数,用于输入要处理的文件或文件夹的路径,该参数与is_valid_path()之前定义的函数相关联。action:在预定义选项列表中执行的操作,以避免任何错误选择。search_str: 要搜索的文本进行操作。pages:处理 PDF 文件时要考虑的页面。generate_content: 指定是否生成输入文件的抓取内容,无论是图像还是PDF到CSV文件。output_file: 输出文件的路径。填写此参数受限于选择文件作为输入,而不是目录。highlight_readable_text: 在置信度大于 30 的可读文本字段周围绘制绿色矩形。show_comparison:显示一个窗口,显示原始图像和处理后的图像之间的比较。recursive: 是否递归处理文件夹。填写此参数受目录选择的限制。
最后,让我们编写使用先前定义的函数的主要代码:
if __name__ == '__main__':
    # Parsing command line arguments entered by user
    args = parse_args()
    # If File Path
    if os.path.isfile(args['input_path']):
        # Process a file
        if filetype.is_image(args['input_path']):
            ocr_img(
                # if 'search_str' in (args.keys()) else None
                img=None, input_file=args['input_path'], search_str=args['search_str'], highlight_readable_text=args['highlight_readable_text'], action=args['action'], show_comparison=args['show_comparison'], generate_output=args['generate_output']
            )
        else:
            ocr_file(
                input_file=args['input_path'], output_file=args['output_file'], search_str=args['search_str'] if 'search_str' in (args.keys()) else None, pages=args['pages'], highlight_readable_text=args['highlight_readable_text'], action=args['action'], show_comparison=args['show_comparison'], generate_output=args['generate_output']
            )
    # If Folder Path
    elif os.path.isdir(args['input_path']):
        # Process a folder
        ocr_folder(
            input_folder=args['input_path'], recursive=args['recursive'], search_str=args['search_str'] if 'search_str' in (args.keys()) else None, pages=args['pages'], action=args['action'], generate_output=args['generate_output']
        )
让我们测试我们的程序:
$ python pdf_ocr.py输出:
usage: pdf_ocr.py [-h] -i INPUT_PATH [-a {Highlight,Redact}] [-s SEARCH_STR] [-p PAGES] [-g GENERATE_OUTPUT]

Available Options

optional arguments:
  -h, --help            show this help message and exit
  -i INPUT_PATH, --input_path INPUT_PATH
                        Enter the path of the file or the folder to process
  -a {Highlight,Redact}, --action {Highlight,Redact}
                        Choose to highlight or to redact
  -s SEARCH_STR, --search_str SEARCH_STR
                        Enter a valid search string
  -p PAGES, --pages PAGES
                        Enter the pages to consider e.g.: (0,1)
  -g GENERATE_OUTPUT, --generate_output GENERATE_OUTPUT
                        Generate content in a CSV file
在探索我们的测试场景之前,请注意以下事项:
- 为避免遇到
PermissionError错误,请在运行此实用程序之前关闭输入文件。 - 搜索字符串符合使用 Python 内置 re 模块的正则表达式规则。例如,将搜索字符串设置为“organi[sz]e”匹配“organise”和“organize”。
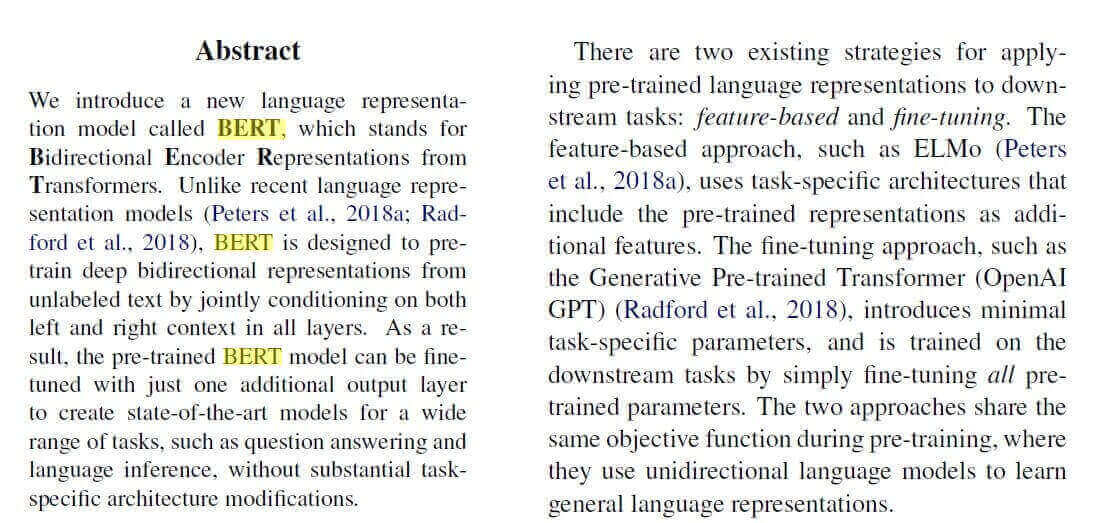
如何使用Python提取PDF图像中的文本?首先,让我们尝试输入一个图像(如果你想得到相同的输出,你可以在这里得到它),不涉及任何 PDF 文件:
$ python pdf_ocr.py -s "BERT" -a Highlight -i example-image-containing-text.jpg以下将是输出:
## Command Arguments #################################################
input_path:example-image-containing-text.jpg
action:Highlight
search_str:BERT
pages:None
generate_output:False
output_file:None
highlight_readable_text:False
show_comparison:False
######################################################################
## Summary ########################################################
File:example-image-containing-text.jpg
Total readable words:192
Total matches:3
Confidence score:89.89337547979804
###################################################################
并且当前目录中出现了一个新图像:
-t或--highlight-readable-text突出显示所有检测到的文本(使用不同的格式,以便将搜索字符串与其他字符串区分开来)。
你还可以通过-c或--show-comparison将原始图像和编辑后的图像显示在同一窗口中。
现在这适用于图像,让我们尝试 PDF 文件:
$ python pdf_ocr.py -s "BERT" -i image.pdf -o output.pdf --generate-output -a "Highlight"image.pdf是一个简单的 PDF 文件,其中包含上一个示例中的图像(同样,你可以在此处获取)。
Python提取PDF文件图像中的文本示例:这次我们将一个 PDF 文件传递给-i参数,并output.pdf作为结果 PDF 文件(所有突出显示都在其中发生)。上述命令生成以下输出:
## Command Arguments #################################################
input_path:image.pdf
action:Highlight
search_str:BERT
pages:None
generate_output:True
output_file:output.pdf
highlight_readable_text:False
show_comparison:False
######################################################################
## Summary ########################################################
File:image.pdf
Total pages:1
Processed pages:1
Total readable words:192.0
Total matches:3.0
Confidence score:83.1775128855722
Output file:output.pdf
Content file:image.csv

Pages Statistics:
   page  page_readable_items  page_matches  page_total_confidence
0   1.0                192.0           3.0              83.177513
###################################################################该output.pdf文件在执行后生成,其中包含相同的原始 PDF,但带有突出显示的文本。此外,我们现在有关于我们的 PDF 文件的统计数据,其中总共检测到 192 个单词,并且使用我们的搜索匹配了 3 个单词,置信度约为 83.2%。
还会生成一个 CSV 文件,其中每行包含从图像中检测到的文本。
结论
我们在示例中没有使用其他参数,请随意探索它们。你还可以将整个文件夹传递给-i参数以扫描 PDF 文件的集合。
Python如何提取PDF文件图像中的文本?Tesseract 非常适合扫描干净清晰的文档。低质量的扫描可能会在 OCR 中产生较差的结果。通常,它不会给出受包括部分遮挡、扭曲透视和复杂背景在内的伪影影响的图像的准确结果。
在此处获取完整代码。
以下是一些其他相关的 PDF 教程:
- 如何在 Python 中为 PDF 文件加水印。
- 如何使用 Python 突出显示和编辑 PDF 文件中的文本。
- 如何在 Python 中从 PDF 中提取图像。
- 如何在 Python 中提取所有 PDF 链接。
- 如何在 Python 中从 PDF 中提取表格。
- 如何在 Python 中签署 PDF 文件。
- 如何在 Python 中提取 PDF 元数据。

