
Python OpenCV检测图像中的形状:在 Python 中使用带有 OpenCV 的霍夫变换技术检测图像中的形状、线条和圆形。霍夫变换是一种流行的特征提取技术,用于检测图像中的任何形状。
在之前的教程中,我们已经看到了如何检测图像中的边缘。然而,这在图像处理阶段通常是不够的。在本OpenCV检测图像形状教程中,你将学习如何使用OpenCV库在 Python 中使用霍夫变换技术检测图像中的形状(主要是线和圆)。
OpenCV如何检测图像形状?霍夫变换是一种流行的特征提取技术,用于检测图像中的任何形状。它主要用于图像分析、计算机视觉和图像识别。
相关: 如何在 Python 中应用 HOG 特征提取。
让我们开始吧,安装需求:
pip3 install opencv-python numpy matplotlib导入模块:
import numpy as np
import matplotlib.pyplot as plt
import cv2
检测线
我将使用计算机显示器的照片,确保你的当前目录中有照片monitor.jpg(你可以随意使用任何一个):
# read the image
image = cv2.imread("monitor.jpg")
我们需要将此图像转换为灰度以进行边缘检测:
# convert to grayscale
grayscale = cv2.cvtColor(image, cv2.COLOR_BGR2GRAY)
让我们检测图像的边缘:
# perform edge detection
edges = cv2.Canny(grayscale, 30, 100)
如果你不确定cv2.Canny在做什么,请参阅本教程。
现在我们已经检测到图像中的边缘,适合我们使用霍夫变换来检测线条:
# detect lines in the image using hough lines technique
lines = cv2.HoughLinesP(edges, 1, np.pi/180, 60, np.array([]), 50, 5)OpenCV检测图像形状教程:cv2.HoughLinesP()函数使用概率霍夫变换在二值图像中查找线段。有关其参数的更多信息,请查看本教程。
让我们画线:
# iterate over the output lines and draw them
for line in lines:
    for x1, y1, x2, y2 in line:
        cv2.line(image, (x1, y1), (x2, y2), (20, 220, 20), 3)
显示图像:
# show the image
plt.imshow(image)
plt.show()
Python OpenCV检测图像中的形状:这是我的输出: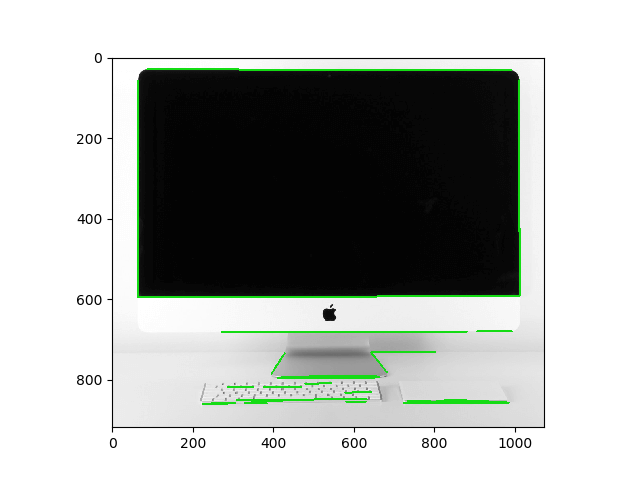
OpenCV如何检测图像形状?绿线是我们刚刚画的线,如你所见,大部分显示器都被绿线包围,随意调整参数以获得更好的效果。
这是用于检测实时摄像机中线条的完整代码:
import numpy as np
import matplotlib.pyplot as plt
import cv2

cap = cv2.VideoCapture(0)

while True:
    _, image = cap.read()
    # convert to grayscale
    grayscale = cv2.cvtColor(image, cv2.COLOR_BGR2GRAY)
    # perform edge detection
    edges = cv2.Canny(grayscale, 30, 100)
    # detect lines in the image using hough lines technique
    lines = cv2.HoughLinesP(edges, 1, np.pi/180, 60, np.array([]), 50, 5)
    # iterate over the output lines and draw them
    for line in lines:
        for x1, y1, x2, y2 in line:
            cv2.line(image, (x1, y1), (x2, y2), (255, 0, 0), 3)
            cv2.line(edges, (x1, y1), (x2, y2), (255, 0, 0), 3)
    # show images
    cv2.imshow("image", image)
    cv2.imshow("edges", edges)
    if cv2.waitKey(1) == ord("q"):
        break
cap.release()
cv2.destroyAllWindows()另请学习:在 Python 中使用 OpenCV 进行图像转换。
检测圆圈
为了检测圆圈,我们需要使用cv2.HoughCircles()方法来代替,我在当前目录中有coins.jpg图像(包含几个硬币),让我们加载它:
# load the image
img = cv2.imread("coins.jpg")
接下来,我们将创建此图像的新副本,我们将在其中绘制检测到的圆圈:
# convert BGR to RGB to be suitable for showing using matplotlib library
img = cv2.cvtColor(img, cv2.COLOR_BGR2RGB)
# make a copy of the original image
cimg = img.copy()OpenCV检测图像形状教程:为了将图像传递给该方法,我们需要将其转换为灰度并模糊图像,cv2.medianBlur()完成以下工作:
# convert image to grayscale
img = cv2.cvtColor(img, cv2.COLOR_BGR2GRAY)
# apply a blur using the median filter
img = cv2.medianBlur(img, 5)
之后,让我们检测圆圈:
# finds the circles in the grayscale image using the Hough transform
circles = cv2.HoughCircles(image=img, method=cv2.HOUGH_GRADIENT, dp=0.9,
minDist=80, param1=110, param2=39, maxRadius=70)如果你想知道这些参数指的是什么,请键入help(cv2.HoughCircles),你会找到很好的解释。
OpenCV如何检测图像形状?最后,让我们绘制并显示我们刚刚检测到的圆圈:
for co, i in enumerate(circles[0, :], start=1):
    # draw the outer circle in green
    cv2.circle(cimg,(i[0],i[1]),i[2],(0,255,0),2)
    # draw the center of the circle in red
    cv2.circle(cimg,(i[0],i[1]),2,(0,0,255),3)

# print the number of circles detected
print("Number of circles detected:", co)
# save the image, convert to BGR to save with proper colors
# cv2.imwrite("coins_circles_detected.png", cimg)
# show the image
plt.imshow(cimg)
plt.show()
这是我的结果:
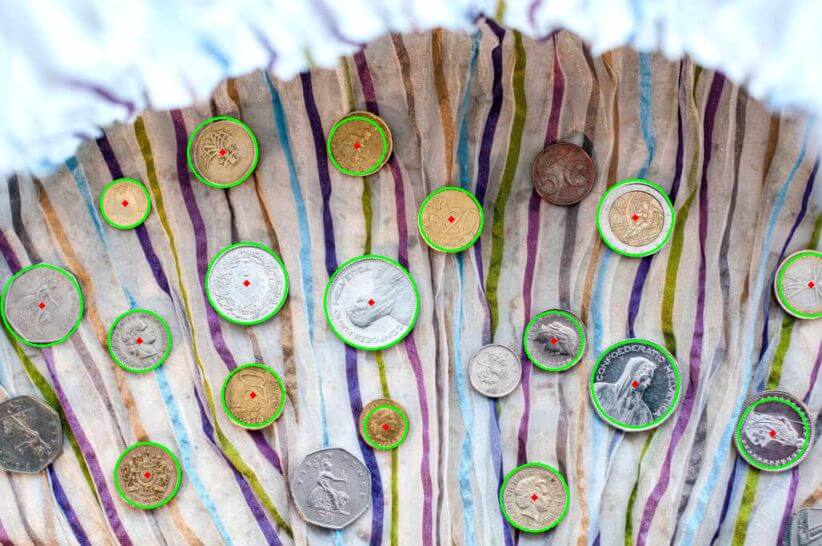
Python OpenCV检测图像中的形状:如你所见,它并不完美,因为它没有检测到图像中的所有圆圈,尝试调整传递给cv2.HoughCircles()方法的参数,看看是否能获得更好的结果。
好了,到此为止,下面是本教程的参考资料:

