
将HTML画布另存为图像非常容易, 只需右键单击画布并将其另存为图像即可完成。但是将画布另存为服务器上的图像是完全不同的。本文将向你展示如何实现这一目标。有时需要在执行某些服务器处理后保存画布图像, 并且本文将有助于通过服务器发送画布图像进行处理。
在这里, 你将看到如何使用JQuery将HTML内容转换为图像。我们知道有一个html2canvas插件, 通过使用该插件, 我们可以轻松地将HTML内容转换为图像内容, 然后我们可以通过右键单击并选择save image选项来保存该文件。
之后, 我们将使用ajax将CANVAS图像转换为URL格式, 然后将其转换为服务器格式, 然后主要部分将由PHP代码完成。 PHP代码会将该图像保存在你的服务器上。
以下步骤将清楚地说明该方法。
第1步:HTML代码将画布转换为图像。
<!DOCTYPE html>
< html >
< head >
< title ></ title >
< link rel = "stylesheet" href =
"http://maxcdn.bootstrapcdn.com/bootstrap/3.3.7/css/bootstrap.min.css" >
< script src =
"https://ajax.googleapis.com/ajax/libs/jquery/1.12.4/jquery.min.js" >
</ script >
< script src =
"http://maxcdn.bootstrapcdn.com/bootstrap/3.3.7/js/bootstrap.min.js" >
</ script >
< script src =
"https://cdnjs.cloudflare.com/ajax/libs/html2canvas/0.4.1/html2canvas.js" >
</ script >
< style >
.top {
margin-top: 20px;
}
h1 {
color: green;
}
input {
background-color: transparent;
border: 0px solid;
width: 300;
}
body {
text-align: center;
}
</ style >
</ head >
< body >
< div class = "col-md-offset-4 col-md-4 col--md-offset-4 top" >
< div id = "createImg" style = "border:1px solid;" >
< h1 >lsbin</ h1 >
< h4 >How to save an HTML5 Canvas as an
image on a server?</ h4 >
< input type = "text" value = ""
placeholder = "Enter wahtaever you want" class = "form-control" />
< br />
</ div >
< button id = "geeks" type = "button"
class = "btn btn-primary top" >
Create Image</ button >
< div id = "img" style = "display:none;" >
< img src = "" id = "newimg" class = "top" />
</ div >
</ div >
< script >
$(function() {
$("#geeks").click(function() {
html2canvas($("#createImg"), {
onrendered: function(canvas) {
var imgsrc = canvas.toDataURL("image/png");
console.log(imgsrc);
$("#newimg").attr('src', imgsrc);
$("#img").show();
var dataURL = canvas.toDataURL();
$.ajax({
type: "POST", url: "script.php", data: {
imgBase64: dataURL
}
}).done(function(o) {
console.log('saved');
});
}
});
});
});
</ script >
</ body >
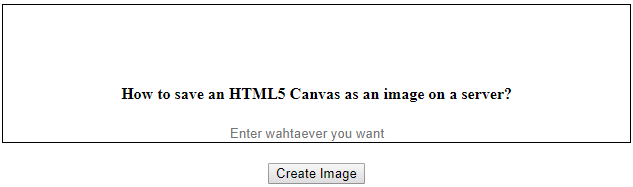
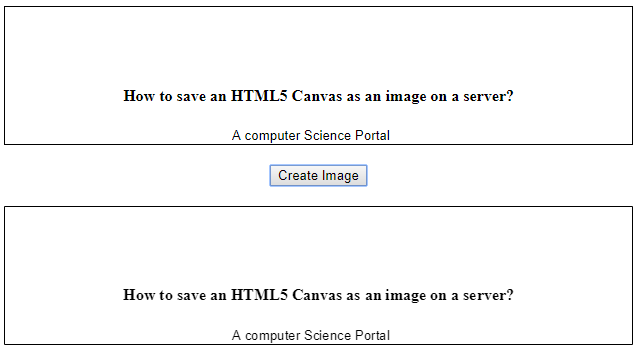
</ html >第2步:显示输出以检查画布是否已成功转换为图像。
在单击按钮之前:
单击按钮后:
第三步:使用canvas.toDataURL()方法将图像转换为URL格式。
var dataURL = canvas.toDataURL();步骤4:通过Ajax将转换后的URL格式发送到你的服务器中。
$.ajax({
     type: "POST" , url: "script.php" , data: {
         imgBase64: dataURL
     }
}).done( function (o) {
     console.log( 'saved' );
});
步骤5:此php代码会将图像保存到服务器中。
<?php

// Requires php5
define( 'UPLOAD_DIR' , 'images/' );
$img = $_POST [ 'imgBase64' ];
$img = str_replace ( 'data:image/png;base64, ' , '' , $img );
$img = str_replace ( ' ' , '+' , $img );
$data = base64_decode ( $img );
$file = UPLOAD_DIR . uniqid() . '.png' ;
$success = file_put_contents ( $file , $data );
print $success ? $file : 'Unable to save the file.' ;

?>
